
How it works
Set up a LoRaWAN sensor network
LoRaWAN sensors send small readings over long distances on very little power. Start with the sensors, check whether you already have a signal, and only install a gateway if you don’t.
How the pieces fit together
Sensors sit in the soil by your trees and plants and send readings by radio. A gateway within range hears them and passes them to The Things Network over the internet. The Things Network then forwards each reading toSteward of Things through a callback, where it appears on the thing and feeds into its care plan.
Many places already have a gateway nearby. Where there isn’t one, a single gateway on a high point can serve every sensor around it, and you only set it up once.
Step 1
Buy the sensors
We use the Dragino SE01-LB soil moisture and EC sensor,£84.71 each on 7 October 2026 (€99.80 from the shop, converted to pounds), excluding VAT, plus postage and packaging. It measures how wet the soil is and its electrical conductivity, which gives an indication of nutrients and salts. Buy one for each thing you want to monitor, and add more whenever you like.
Its readings feed the thing’s care plan, so watering tasks can follow what the soil is actually doing, not just the calendar.
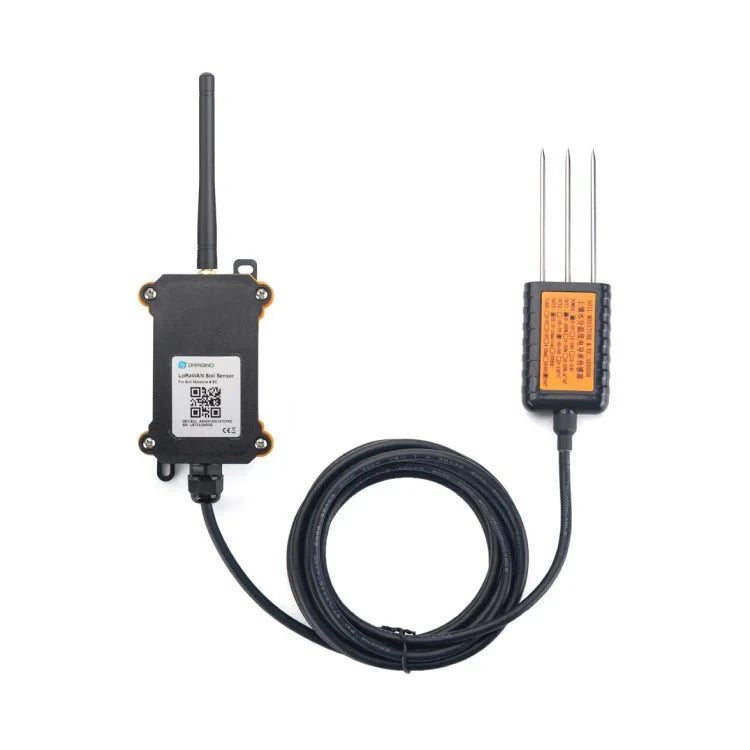
Product image courtesy of Invibit Shop.
Step 2
Check whether you already have a signal
If a LoRaWAN gateway already covers your site, you don’t need to buy or install one. Skip straight toconnecting your sensors.
Look at the coverage map
The Things Network publishes a map of the gateways it knows about. If one is within a few kilometres of your site, with a reasonably open view between, there is a good chance you are covered.
Ask locally
Schools, councils, community groups and neighbours sometimes run their own gateways, and not all of them appear on the map. Some will let you use theirs.
Test with a real sensor
The map only tells you so much. Register one sensor, put it where it will live, and watch the live data in The Things Network console. If readings arrive, you are covered. If it never joins, you need a gateway.
No signal? Carry on to step 3 and install your own gateway.
Step 3, only if there is no coverage
Install your own gateway
We use the Dragino DLOS8N, an outdoor gateway for the European 868 MHz band. It was £182.07 on 7 October 2026, excluding VAT, plus postage and packaging. The shop prices in euros (€214.50), converted here at the ECB rate for 6 October 2026, so your actual cost may differ slightly.
LoRaWAN EU868
8-channel gateway that receives several spreading factors at once.
Ethernet and Wi-Fi
Wi-Fi works as a client or as an access point.
IP65 outdoor enclosure
Waterproof and dustproof, made to live outside.
Power over Ethernet
One cable carries both power and data.
Pre-configured forwarder
Works with TTN, ChirpStack, Helium and custom servers.
Remote management
Web UI, SSH, and MQTT or HTTPS uplinks.
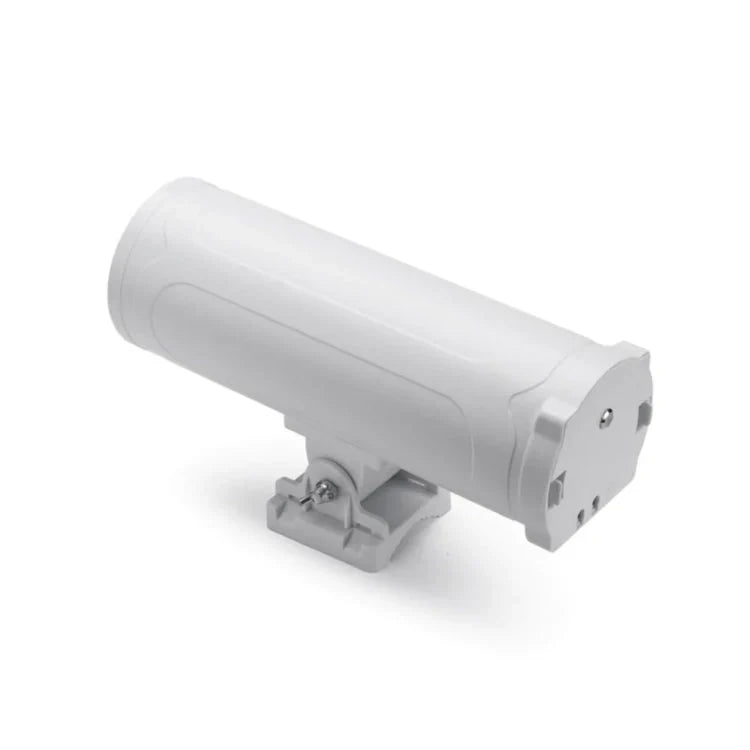
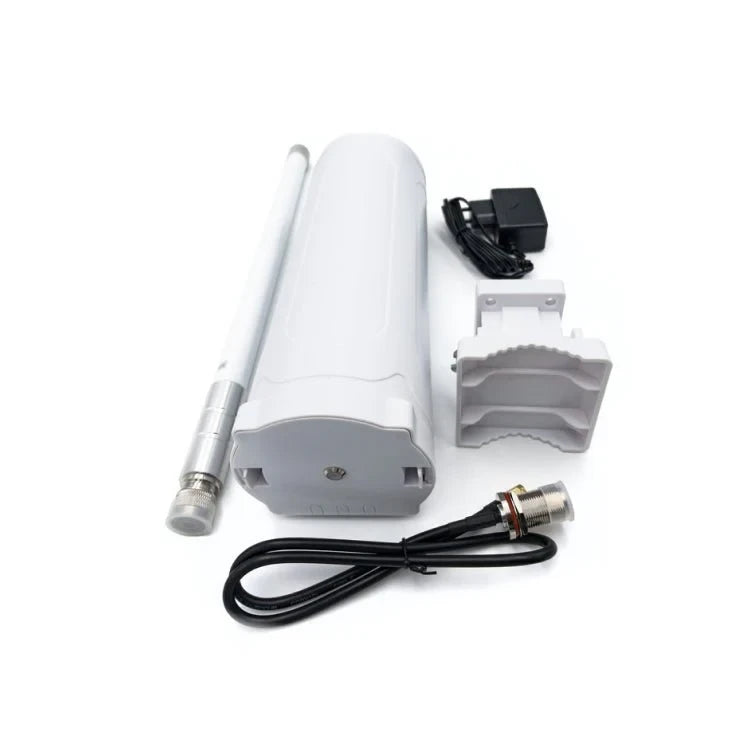
Product images courtesy of Invibit Shop.
What you need to buy
Prices are those shown by the supplier on 7 October 2026and may change. All prices exclude VAT. Postage and packaging are extra.
| Item | Notes | Price |
|---|---|---|
| Dragino DLOS8N outdoor LoRaWAN gateway (EU868) | One per site. A single gateway covers a wide area, so a school, a park or a village green often needs just one. | £182.07 |
| Pole and mounting brackets | Needs to be fixed somewhere high and clear, such as a chimney, gable end or mast. | Varies |
| Power over Ethernet (PoE) source | Use a PoE-capable router or switch if you have one. Otherwise buy a PoE injector. | Varies |
| Outdoor Ethernet cable | Run from the PoE source to the gateway. Length depends on the site. | Varies |
Installing the gateway
Allow around half a day of an engineer’s time for the physical install and registering it on The Things Network.
- 1
Choose where the gateway goes
Pick the highest sensible spot with a clear view over the area you want to cover. Height matters more than anything else for range. You also need to be able to run a cable from it to a router and a mains socket.
- 2
Fix the pole
Mount the pole securely at that height. This is work at height, so use a qualified installer or follow your own site safety rules. Get the building owner’s permission first.
- 3
Mount the gateway
Attach the DLOS8N to the pole with the antenna pointing up and clear of obstructions. The enclosure is IP65, so it can stay outdoors all year.
- 4
Run the Ethernet cable
Connect the gateway to a PoE-capable router or switch. If you don’t have one, put a PoE injector in the line. The router or injector then plugs into a power socket and has an internet connection.
- 5
Register the gateway on The Things Network
Create a free account, add the gateway using its EUI, and point its packet forwarder at The Things Network for the EU868 region. Once it connects, the console shows it as online.
- 6
Check your sensors can reach it
With the gateway online, watch the live data for a registered sensor. Readings should now arrive. If a sensor is far away or low down, move it nearer or raise the gateway.
What it could cost overall
An example: 5 sensors and one new gateway, installed professionally. Supplier prices are as of 7 October 2026 and exclude VAT.
| Item | 1 sensor, no gateway required | 5 sensors and a new gateway |
|---|---|---|
| SE01-LB soil sensors (£84.71 each) | £84.71 | £423.55 |
| Dragino DLOS8N gateway | – | £182.07 |
| Pole and mounting brackets estimate | – | £35.00 |
| PoE injector (if needed) estimate | – | £15.00 |
| Outdoor Ethernet cable estimate | – | £15.00 |
| Installer, about half a day estimate | – | £500.00 |
| Total, best case | £84.71 | £1,170.62 |
- The gateway and sensor prices are the supplier’s. The other lines are our rough best-case planning allowances, not quotes, so get your own. Real costs may be higher.
- All prices exclude VAT, and postage and packaging are extra on everything you order.
- The first column is the cheapest way in: if a signal already exists on your site, one sensor is all you need to buy.
- Each extra sensor adds about £84.71.
Step 4
Connect your sensors to Steward of Things
This is the same whether you use an existing gateway or your own.
- 1
Create an application and add your sensors
In The Things Network console, create an application and register each SE01-LB sensor using the keys supplied with it. Pick the Dragino SE01-LB from the device repository, so The Things Network decodes its readings for you. Give each sensor a short device ID using letters, numbers and hyphens, such as oak-bed-1. You will need to enter exactly the same ID in the app.
- 2
Set up the Steward of Things callback
In the application, add a webhook integration that sends uplink messages to Steward of Things. The settings are below.
- 3
Add each sensor as a device in the app
Sign in at app.stewardofthings.com and use the Add Device option. You need to be an admin of the thing the sensor will watch. The form asks for the details below. Once it is saved, readings from The Things Network are matched to the device and shown on that thing.
The Steward of Things callback
In The Things Network console, open your application, go to Integrations, then Webhooks, and add a custom webhook with these settings.
| Webhook format | JSON |
|---|---|
| Base URL | https://api.stewardofthings.com |
| Path for uplink messages | /measurements |
| Method | POST |
| Enabled message types | Uplink message |
Steward of Things matches each reading to a thing by the sensor’s device ID. If a reading arrives for a device ID that hasn’t been added in the app yet, it is not stored. Add the device first, then check readings are arriving.
Adding the device in the app
Open app.stewardofthings.com, choose Add Device, then fill in:
| Thing | Choose the thing this sensor is watching. You can only pick things you are an admin of. |
|---|---|
| Device model | Choose “Soil Moisture & EC Sensor”. |
| Name | A friendly name, 3 to 255 characters. Letters, numbers, spaces and hyphens only. |
| Device Id | Exactly the device ID you gave the sensor in The Things Network. Letters, numbers and hyphens only, so no underscores. If the two don’t match, readings are not stored. |
| Location | Where the sensor is in the ground. It starts from your current location, so move the pin if you are not standing at the sensor. |
Save it and the device page opens. After the sensor’s next reading, the latest moisture and conductivity show on the device and on the thing it watches. Sensors report every 20 minutes, so give it a little time.
Need a hand?
Apex Aerialscan install gateways. They are based in Haslemere, Surrey, cover Surrey and a 50-mile radius, and offer free no-obligation quotes. Phone 07850 830605 or emailgary@apexaerials.co.uk.
For anything else, get in touch and we can talk through your site.